ScreenPhone has the ability to forward calls, record voice mail, record calls, and playback recordings to the user. The following sections describe:
| • | how calls can be configured to forward on busy and no answer; |
| • | how voice mail is configured and how what is displayed during the voice mail; |
| • | how call recordings are configured; |
| • | how recordings are played back. |
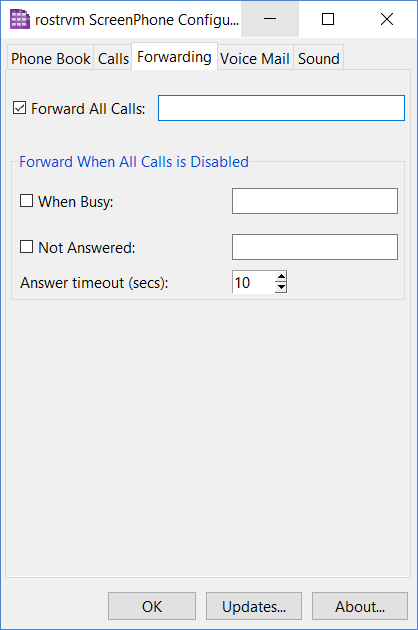
The forwarding settings can be configured from the Forwarding tab on the configuration window selected from the Configure... option on the system tray menu.
A ScreenPhone user may only access the forwarding configuration if they have the ScreenPhone Call Forwarding permission enabled through Manager. Selecting the Forwarding tab will request a user name and password if ScreenPhone has not already done so.
Call forwarding configuration overrides the voice mail settings.
If the Forward All Calls entry is checked and a destination has been supplied in the text entry box, all calls arriving at the ScreenPhone are forwarded to the supplied destination. This overrides the forward on busy and forward on not answered options.
If the forward When Busy entry is checked and a destination has been supplied in the text entry box, all calls arriving at the ScreenPhone while the user is already on a call, are forwarded to the supplied destination.
If the forward Not Answered entry is checked and a destination has been supplied in the text entry box, calls that are not answered within the configured time are forwarded to the supplied destination. The no answer time may be configured between 1 and 30 seconds.
The destinations may contain a full SIP URI or a device ID.
ScreenPhone has a voice mail capability that allows callers to leave a message if you are away from your desk, or if you are busy on another call. Voice mail is configured by selecting the Configure... option from the main menu and then selecting the Voice Mail tab.
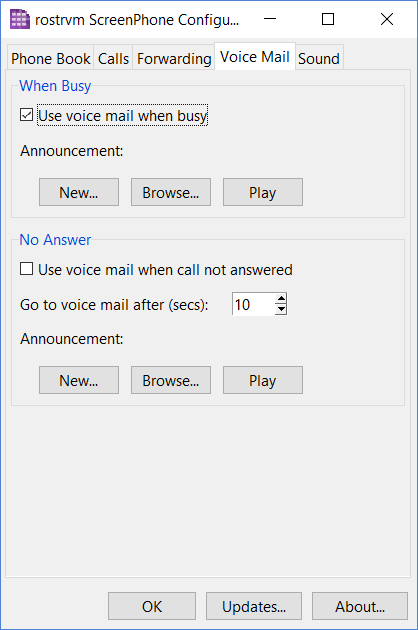
Configuration is available for two scenarios; when you are busy, and when you do not answer.
It is also possible to set yourself busy without handling a call. This can be done by selecting the I am busy option from the configuration menu (note this is only available to agents with an appropriate role, e.g. ScreenPhone).
Recording an announcement
To record a voice mail announcement, click on the New... button from either the When Busy or No Answer frames. The Record announcement dialog is displayed.
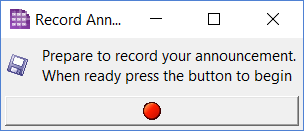
The announcement can then be recorded through the PC microphone by clicking the start recording button. This is replaced with the stop recording button which can be clicked when you have finished recording.
Play back an announcement
The Browse..., and Play buttons in each area allow you to retrieve from a wave file or listen to the announcement that will be played to the caller. A different announcement may be used for each scenario.
The Use voice mail when ... checkboxes may be de-selected to disable the voice mail function. Also the time for a no-answer is configurable as shown.
Listening to a voice mail
While a voice mail message is being taken, a call control window similar to that shown below is displayed:
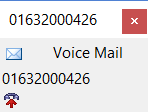
You may select the connect button to interrupt the voice mail system and take control of the call.
Once the voice mail message has been taken, the call control window will be left on the screen with a button to allow you to playback the message left by the caller. The voice mail messages are also available from the Voice Mail sub-menu from the main menu.
The same playback control used for playing call recordings is used for playing voice mail messages, so the same facilities and controls are available.
ScreenPhone can record telephone conversations for later playback, email or storage.
There are two recording modes, either all calls are recorded, or selected calls are recorded. If the Record all calls option is selected in the call options configuration all calls are recorded. If the option is not selected a button is available on call control windows to allow the user to select the call for recording.
Once a call has been recorded it is available from the main menu under the Call Recordings sub-menu. The name/number of the remote party, and the time of the call is shown on the menu entry.
To playback a recording select it from the Call Recordings sub-menu. The Playback dialog is displayed:
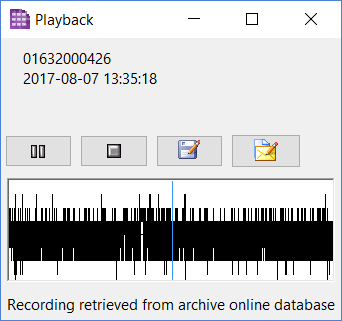
The buttons on the playback window (from left to right) are:
| • | Play/Pause - the slider at the bottom of the window may be used to adjust the playback position; |
| • | Stop playback (playback position is set to the start); |
| • | Save the recording to a WAV file. This allows you to use the recording in an external application, or to save it to an archive; |
| • | Email the recording; |
| • | Delete the recording - when selecting this option you will be prompted to confirm the deletion before the action is actually carried out. |