When Web AdVisor is configured to handle emails additional functions are made available to the agent,
Email Functions
When Web AdVisor is configured to handle email - which may include other media such as SMS messages and Web forms - an extra button (Create new email) and a number of tabs (one for each incoming email being handled) are made available:
New email contacts are displayed with bold text and a flashing background when first received. The flashing background and bold text effect are removed once the contact has been selected/answered.
Clicking the X icon on the My Task List frame will hide the contact tabs by sliding the display to the left. Clicking the > icon on the far left will re-display the contact tabs by sliding the display to the right.
Opening an Email
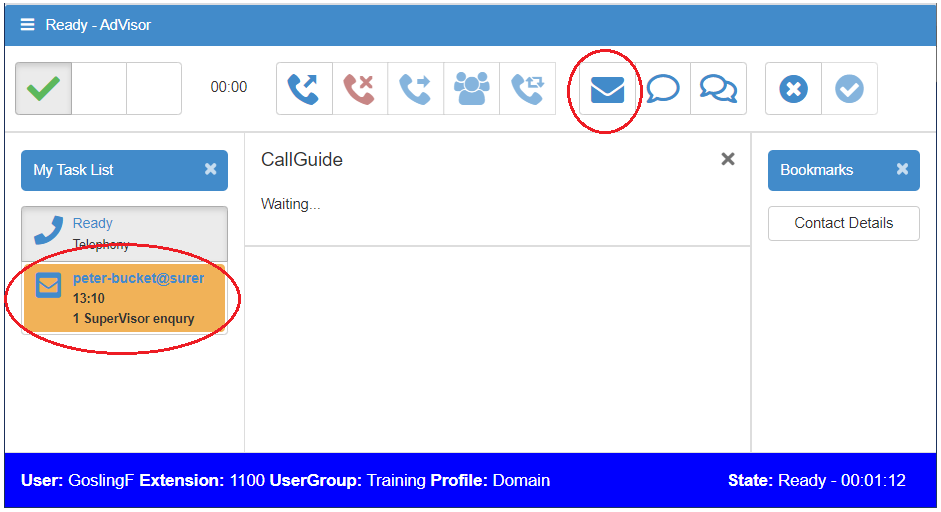
When you have an email contact to handle an additional vertical tab is present at the right-hand side of the display. This tab contains the email icon and a summary of the message received.
To open the email click on the tab. The message is displayed. For emails rostrvm can use information in the email, such as the sender's email address to add other information to the display. You may, for example, present details of previous contacts with the sender.
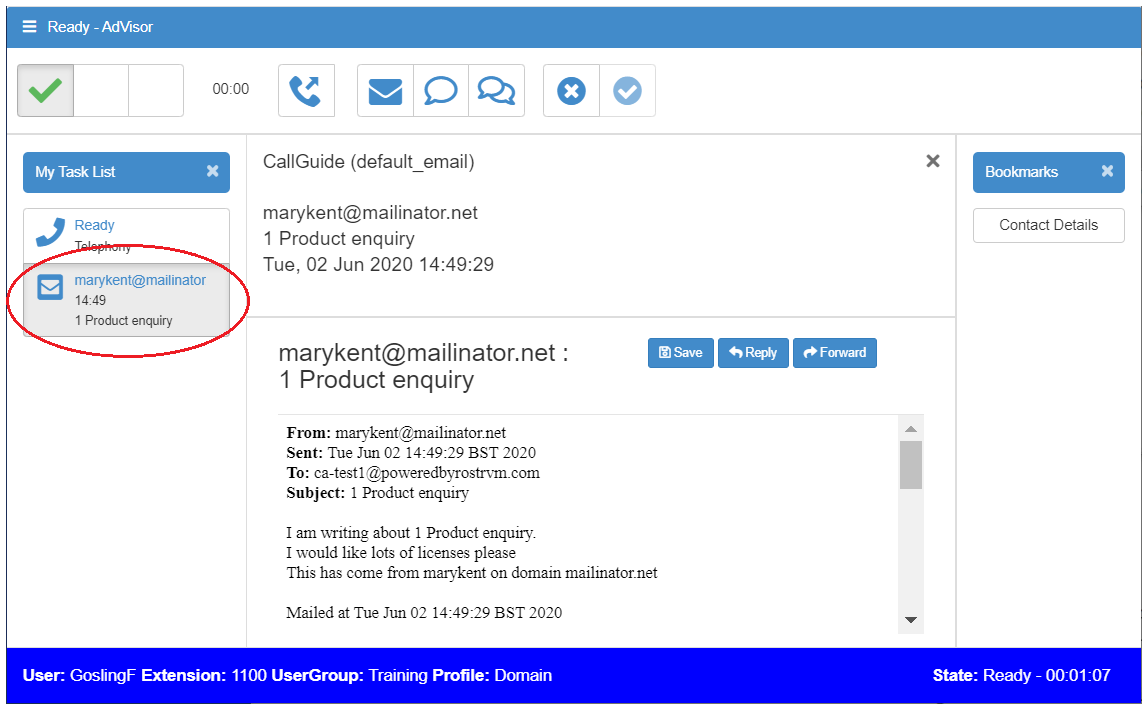
An indication of any attachments is shown on the Summary email tab as the standard paper clip icon. The attachments themselves are shown as buttons above the email content and can be manipulated individually by clicking on the appropriate button.
Once the email has been handled click the Finish button to remove it from the display, or proceed through your CallGuide script accordingly.
Operations
To reply to an email
Click the Reply button then compose and format your response.
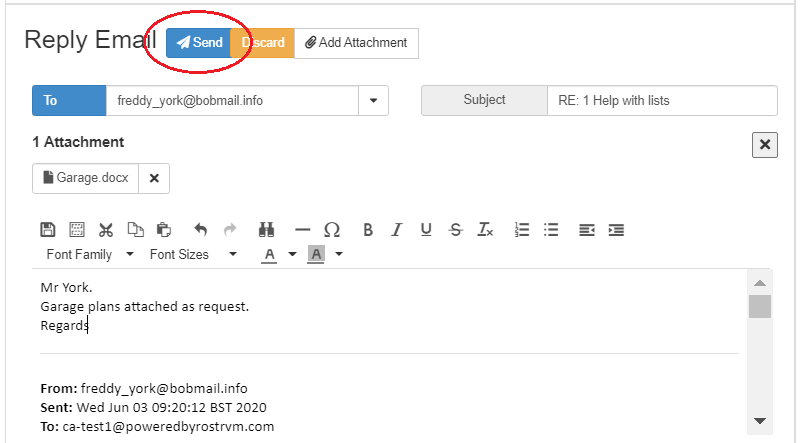
File attachments can be included in the reply using the Attachments button. When you have completed your message click the Send button.
To forward an Email
Click the Forward button.
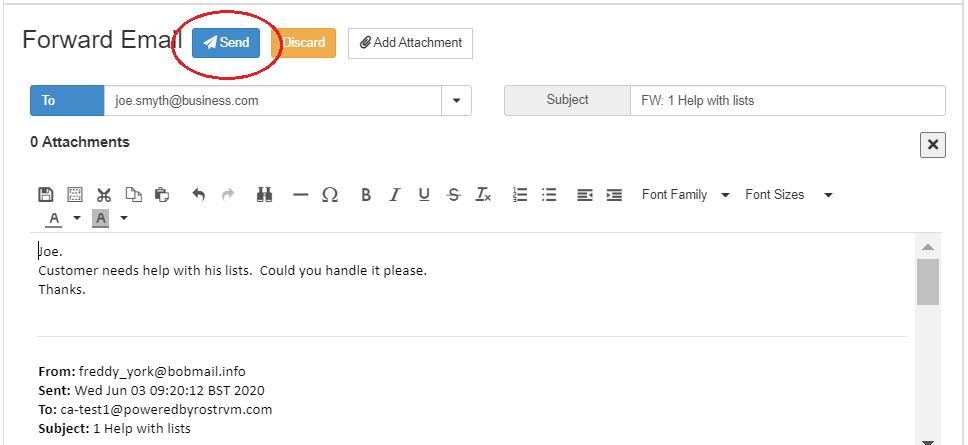
Using the select destination dialog enter the recipient in the To field (for emails this is an email address), and enter any information you wish to add to the message. When you have completed your message click the Send button.
To requeue an Email
Click the Requeue button. The Select Destination dialog is displayed. This allows the email to be requeued to another rostrvm agent.
To save an Email
Click the Save button. This will download the email body document using the browsers default handling. This gives the agent the ability to save a copy of the email along with any attachments to the local drive.
To finish with an Email
Click the Finish button. The email is discarded.
To create a new Email
Click the Create email button. You will then be presented with the New Email panel on your display.

From here you may:
| • | Enter from which mailbox the email is to be sent; |
| • | Add any file attachments; |
| • | Enter the recipient of the email in the To field. This field has a Show Cc and Bcc button on the right hand side. Once the Cc and Bcc fields have been shown this button is hidden and the addresses can be selected in the same way as the To addresses; |
| • | Enter the subject and body of the email. |
When you have completed the your email click the Send button. The new email panel is removed.
Formatting Emails and attaching files
Whether replying, forwarding, and transmitting a new email, there are a number of buttons and drop-down menus provided in order to format your email text. It should be noted that for media types that do not support styling (such as SMS text) then only those formatting options that are applicable to the media type are made available.

The Attachments box allows files to be attached to the email (click the x to remove the attached file).
The formatting tool bar allows text to be formatted using standard formatting functions. Hovering over the button displays its function. These include:
| • | Save document to local drive - saves the current email and any attachments to the local drive; |
| • | Insert template - this button invokes the template dialog allowing you to select a template for the email you are about to generate (these are created and managed using the Manager Outbound Templates utilities); |
| • | Cut, copy, paste, undo and redo; |
| • | Find and replace; |
| • | Insert line and insert special character; |
| • | Bold, italic, underline, strike-through, and remove format; |
| • | Insert/remove number or bullets, decrease/increase indent, and block quote; |
| • | Drop-down lists of text font and size, foreground colour, and background colour. |