The CallDirector Script Editor is a graphical user interface for the creation, display, and modification of call routing scripts. Scripts are shown as flowcharts containing simple operations connected together as a sequence of decisions and actions to build up a complex routing script for handling the call end-to-end. The Editor is extensible in that flowcharts may be reused in other flowcharts.
The following overview sections describe:
| • | how to start the editor; |
| • | the layout of the editor; |
| • | creating new scripts from within the editor. |
More details are given in other sections about:
| • | building a flowchart; |
| • | the pre-defined nodes. |
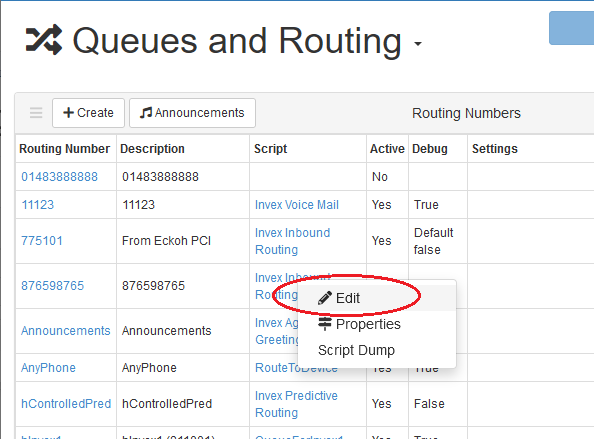
CallDirector editor is invoked from Manager by selecting Edit from the Script drop-down menu from the Routing Numbers panel on the Queues and Routing page available from the Inbound drop-down menu:
It may also be invoked from the System menu CallDirector Scripts report.
The CallDirector Editor utility is started if it has previously been installed, otherwise the install dialog is displayed.
Terminology
Script |
The code executed by CallDirector in order to handle a contact. |
Flowchart |
The graphical representation of a script in the CallDirector Editor. |
Node |
A single pre-defined set of steps in a flowchart in the CallDirector Editor. |
Custom Macro |
A single custom script containing a set of steps in a flowchart that are normally used by other flowcharts (i.e. invoked from other scripts). Custom macros are essentially just other scripts. |
The Editor window
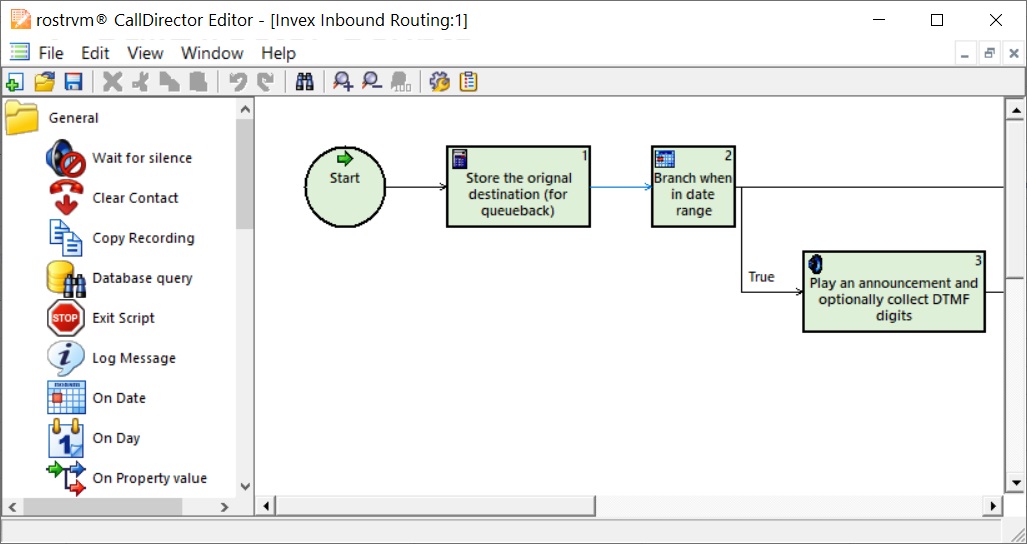
The Editor window is the focal point of the CallDirector Editor. It is used to view all the flowchart windows, and is the anchor point for the dockable toolbars. The Editor uses a Multiple Document Interface (MDI), hence this window can act as a host for one or more flowchart windows, between which elements can be copied, pasted, dragged or dropped.
The Flowchart window
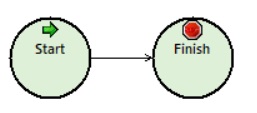
A flowchart window appears in the Editor window for every script open for edit. The flowchart is a graphical representation of the script, built from nodes and custom macros that flows from the Start node to the Finish node. An empty script is represented by a flowchart with just Start and Finish nodes, connected by an arrow.
Toolbar

The toolbar contains the common operations that may be applied to the flowchart(s) open in the Editor Window.
Node List Pane
Sets of script nodes (and optionally custom macros) that are used to build up scripts in the flowchart window. The nodes that appear in this pane may have been designed specifically for you.
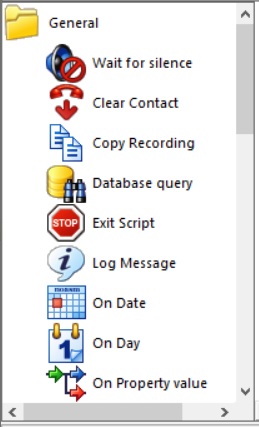
See pre-defined nodes for a description of each one.
Properties window
The Properties window is a multi-purpose form for showing named properties and values. These can be properties of a script or properties of a node in a script.
Flow properties
The Flow Properties window is invoked from the Menu toolbar by clicking View and selecting Properties window from the drop-down list.
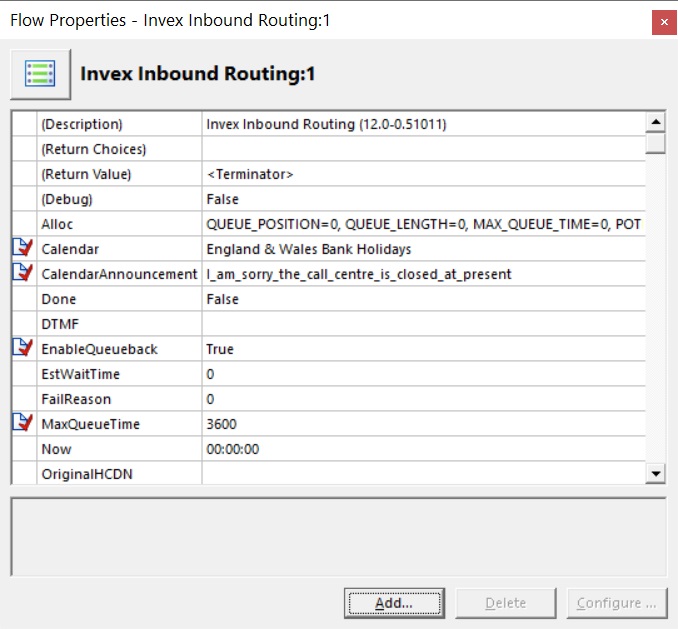
This shows the properties of the script. These are global names known to the whole script, which are used to share information between nodes in the flowchart. They may also be exposed to the end-user through the flow property sheet.
Some default settings are available by default for all scripts.
Description |
Allows different descriptions to be applied to each version of a script. |
Debug |
Setting this to True will cause each operation and associated results executed by the script to be output to the rostrvm log file. |
Return Value |
The value to be returned to the calling script. This is used for custom macros that can be invoked by other scripts. The default <Terminator> means that the contact handling will end when this script returns. |
Return Choices |
A list of possible choices that may be returned by this script when it is used as a custom macro. Each return choice should be separated with a vertical bar '|'. |
Statement properties
When a node in a flowchart is double clicked the Properties window will pop and show the properties of the node.
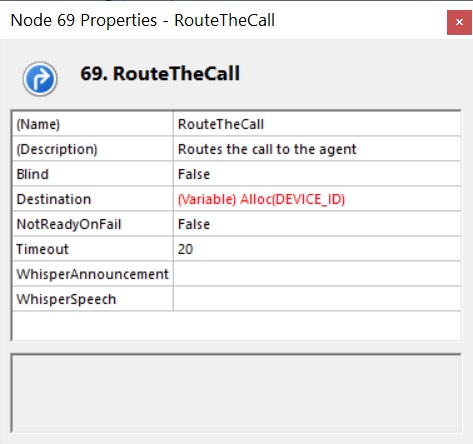
These are the input parameters to the node. For instance, a RouteTheCall node takes a number of parameters - the destination, the transfer type (blind or attended), a request timeout (normally 5 seconds) and others.
CLIPboard window
The CLIPboard window is invoked from the Menu toolbar by clicking View and selecting CLIPboard window from the drop-down list.
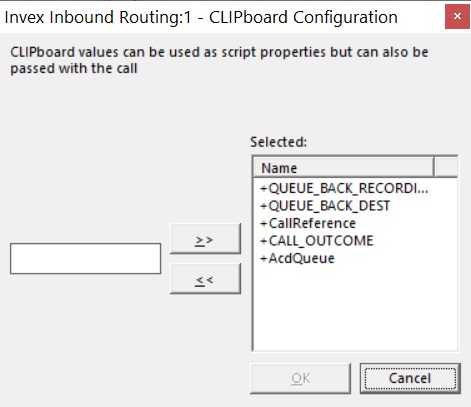
The CLIPboard window can be thought of as containing named values that are not only global to the script, but also to other scripts that may be used when handling a call. CLIPboard elements are used by rostrvm to route data with the call. They can be passed to script nodes and macros by setting a node property (input parameter) to a CLIPboard element set up in the CLIPboard window.
Normally, new scripts are created through Manager by first creating a new Routing Script entry, and then editing it as described above. The Editor can also be used to create a new flowchart that can subsequently be saved back as a new script.
To create a new routing script, from the File menu select New from the drop-down list.
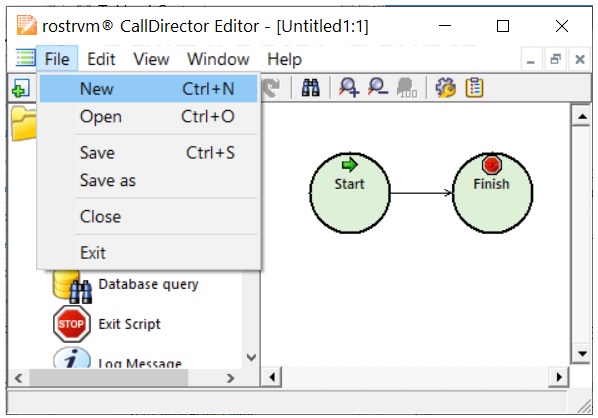
This creates an empty flowchart with the name of "Untitled<number>". When you save this (using the Save or Save Asoptions from the File menu drop-down list) a dialog box will request where the new chart will be saved. In this instance, select Save As, the Save dialog box appears.
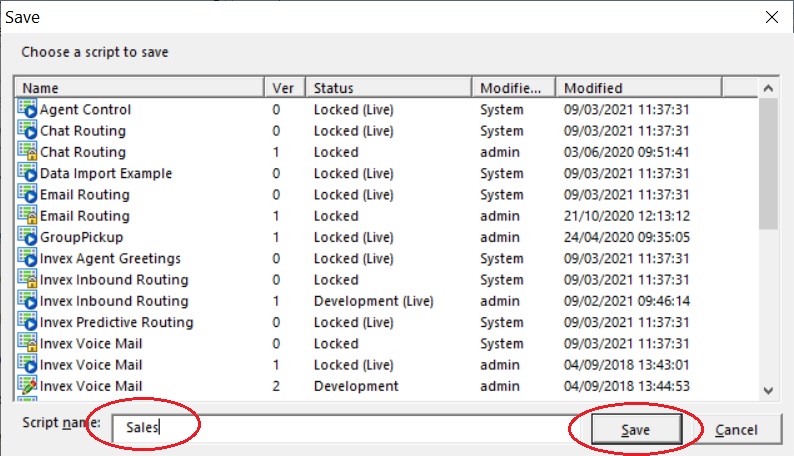
From here you can choose either:
| • | an existing version, to create a new version of that script (you cannot over-write an existing version); |
| • | to type in the name of a script which does not appear, in which case a new script is created and the script is saved as a version 1. |