The Agent Simulator may be run with the other server processes from the Manager configuration screens, or can be run as a separate application either on the server or on a different PC.
For the latter, the file to copy is agent_simulator.exe.
Running the desktop application
Once copied to the desired location, it can then be started from the command line, or from a shortcut created on the desktop in the same way as for any other windows application. For example:
"C:\Program Files\rostrvm\bin\winnt\agent_simulator.exe" –user <rostrvm user>
The following screen is initially displayed:
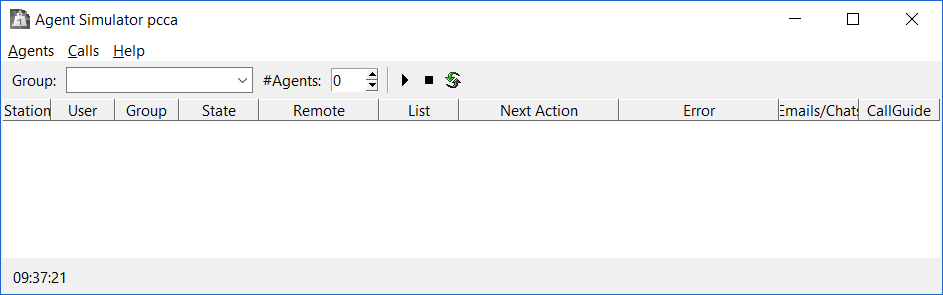
Each instance is normally used to emulate a number of agents from a specific agent group. The available agent groups and switches that have been configured in your rostrvm system will appear in the Group drop-down menu. These should be selected before progressing.
Note: You can try and use the harness without selecting a group but if you do it will connect to any device available using any user available (whether it is configured for an agent group belonging to that switch or not). The results are unpredictable and hence pointless – always select an agent group.
Multiple Instances
As each harness is generally used for a single agent group, it is normal to run multiple instances – one for each agent group that you wish to emulate. So a typical example may involve at least 4 (one for inbound, one to accept transfers, one for an outbound progressive campaign, and one for an outbound predictive campaign).
Initial Configuration
Once a group has been selected you are pretty much ready to go. However, there is one more configuration item that you may wish to change before starting the load test. The number of agent being emulated (default is 10) can be set from the #Agents drop down menu. Other than the first time that this agent group is been emulated, this value will be pre-populated with that set last time (per agent group).
Care should be taken to ensure that enough users have been configured in rostrvm as agents belonging to the given agent group.
Note that there are many more items that can be configured for more advanced testing – these are defined in the Configuration section.
Starting
The load test is started by logging the agents on to rostrvm. This is achieved by selecting the Logon agents button.
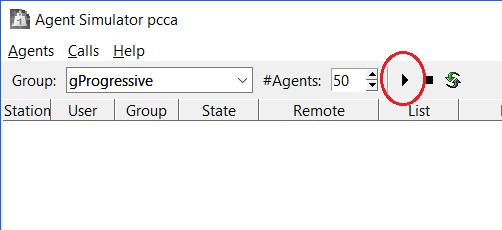
The harness first checks the database for station devices allocated to the given switch and connects to them using the defined users with agents configured with the given agent group. By default the connects are performed instantly for all devices, but this can be changed to be randomly spread out within a configurable logon interval.
Once the user has successfully connected to the device, the agent is logged on to the agent group, and then set to the ready state (assuming the auto-Ready option is set).
If this is an active outbound campaign agent group then calls will start appearing as the dialler begins dialling accounts on the agent’s behalf. If this is an inbound agent group then calls will appear as rostrvm routes calls to the agents once the contact simulator load test mode has been invoked.
Actions, progress, and the status for each agent is displayed in the display window.
Stopping
This is achieved by selecting the Logoff agents button.
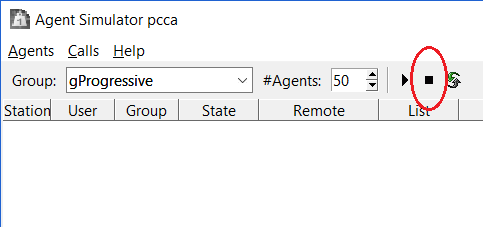
All current calls are cleared, all agents that are currently logged on are logged off the agent group, and the users are disconnected from the device immediately.
Note that particularly for inbound calls, the contact simulator load test mode should be switched off before the logging the agents off. If not then incoming calls will still be generated and build up on the inbound queues.
Stopping the application
The harness should be stopped by selection the drop-down menu option Agents > Exit.
Any configuration settings will be saved against that agent group and hence maintained when the harness is started and the agent group used again.
Running as a rostrvm server process
Starting
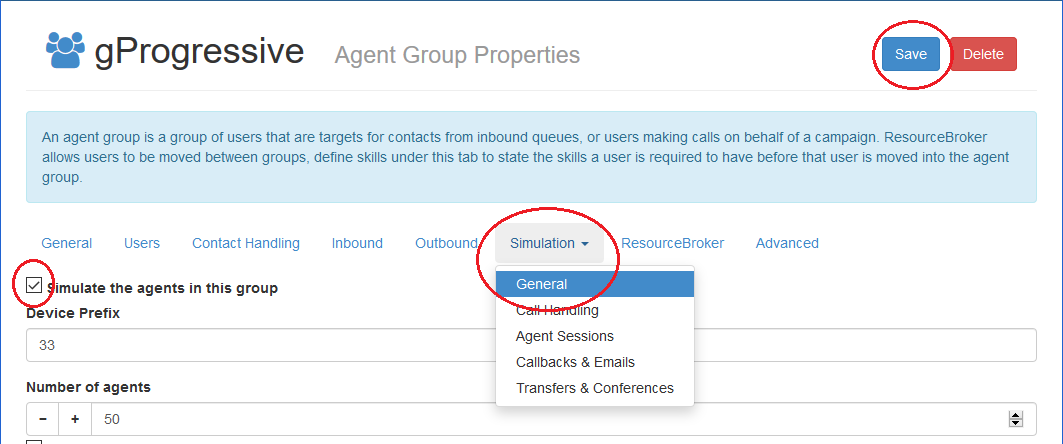
To run the agent simulator as a normal rostrvm server process then navigate to the agent group properties for which you wish to emulate, select Simulate the agents in this group tick box from the Simulation > General tab, and click the Save button:
A new process AGTSIM_<group> is seen in System Control Process list. Actions, progress, and the status for each agent can be followed using the standard Manager displays.
Multiple Instances
Each instance is used for a single agent group. To run multiple instances simply repeat the actions above for each agent group to be emulated. A new process will appear in System Control for each one.
Initial Configuration
A couple of items need to be configured prior to emulating an agent group. The number of agents being emulated (default is 10) needs to be set in the Number of agents field on the Simulation > General tab, and the Shift start time and Shift end time field on the Simulation > Agent Sessions tab need to be set in order for the agents to be logged on.
These and all other configuration options are described in more detail in the Configuration section.
Stopping the process
To stop the agent simulator as a normal rostrvm server process then navigate to the agent group properties for which you are emulating, de-select the Simulate the agents in this group tick box from the Simulation > General tab, and click the Save button.
All current calls are cleared, all agents that are currently logged on are logged off the agent group, and the users are disconnected from the device immediately. The appropriate process is stopped and removed from the System Control main window.